#AzureStackHub

Azure CLI: Determining location of CA certs to work with Azure Stack Hub/ASDK

I’ve been doing some work on Azure Stack HUB (ASH) and ASDK recently, and the perennial problem with certificates has raised it’s head again. This is a quick blog post for anyone using Linux and Azure CLI to administer to figure out where you should store the CA root certificates, as the documentation is somewhat vague.

  • Once installed, check the version and what Python version is used (We need to make sure that any Python commands we are running uses this version. )

az --version
  • Next, install pip for the python version the az cli is using (in this case it’s Python 3.9. but future versions could change)

curl https://bootstrap.pypa.io/get-pip.py -o get-pip.py
python3.9 get-pip.py
  • Install the Certifi module:

pip install certifi
  • Now you can determine where the cacert.pem file is located as used by az cli:

python3.9 -c "import certifi; print(certifi.where())"
  • Now you can add the ASH or ASDK CA certs to the store for use by Azure CLI:

cat <CA Cert>.pem >> ~/.local/lib/python3.9/site-packages/certifi/cacert.pem

You can use the docs here to obtain the CA root certificate, or if you’re running a Linux VM from within ASH/ASDK, simply run:

sudo cat /var/lib/waagent/Certificates.pem >> ~/.local/lib/python3.9/site-packages/certifi/cacert.pem

- If you were to follow the Microsoft docs, I found az cli would still not be able to communicate successfully.

It is necessary to run the following:

export REQUESTS_CA_BUNDLE=~/.local/lib/python3.9/site-packages/certifi/cacert.pem
# RECOMMENDED: set the env var automatically for your subsequent sessions
echo 'export REQUESTS_CA_BUNDLE=~/.local/lib/python3.9/site-packages/certifi/cacert.pem' >> ~/.bash_profile

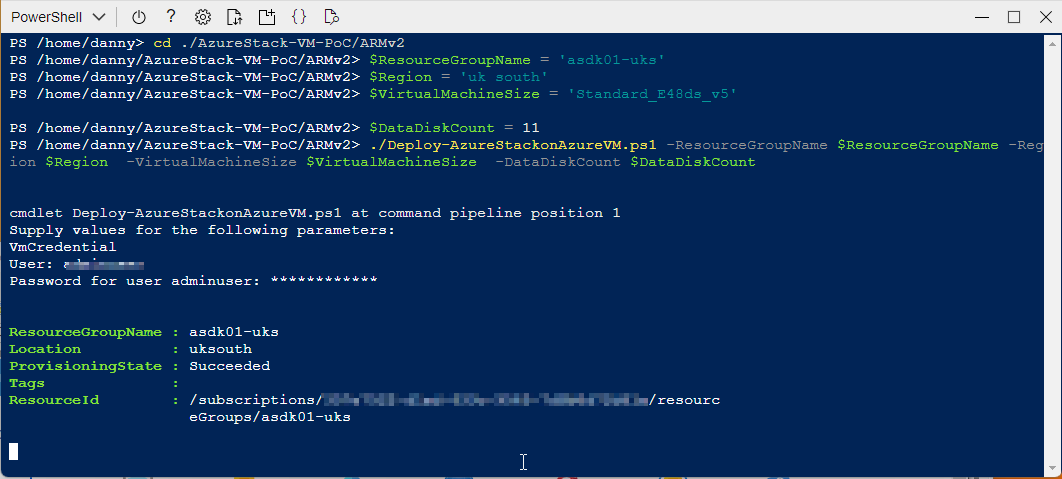
As you can see above, I have been able to run az cli targeting ASDK, whereas before, it would throw the SSL error.

Tested on CentOS 8 and Rocky Linux 8.5

Deploying ASDK 2206 to an Azure VM

Azure Stack Hub version 2206 was release a couple of months ago, but anyone trying to deploy ASDK 2206 to Azure will have found that the latest version is 2108. Until the official method is updated, here’s how you can do it .

I’m using the awesome scripts by Yagmur Sahin as the basis for the solution: https://github.com/yagmurs/AzureStack-VM-PoC

  • Open the Azure portal and then create a PowerShell Cloud Shell.

I recommend you reset the user settings, as there can be issues with versions of the Azure PowerShell modules.

  • Run the following command in the new PowerShell session:

git clone https://github.com/dmc-tech/AzureStack-VM-PoC.git
  • Run the following, changing to meet your requirements. VirtualMachineSize can be from the following sizes:

    "Standard_E32s_v3",

    "Standard_E48s_v3"

cd ./AzureStack-VM-PoC/ARMv2

$ResourceGroupName = 'asdk01-uks'
$Region = 'uk south' 
$VirtualMachineSize = 'Standard_E48s_v3' 
$DataDiskCount = 11

./Deploy-AzureStackonAzureVM.ps1 -ResourceGroupName $ResourceGroupName -Region $Region  -VirtualMachineSize $VirtualMachineSize  -DataDiskCount $DataDiskCount

The configuration example above has enough resources to run an OpenShift cluster.

Running the script will initially:

  • Create a resource group

  • Create a storage account

  • copy the ASDK 2206 VHD image to the storage account

  • Create the VM using the VHD image

  • Create a Public IP for the VM

Note: As part of the provisioning process, the admin user account you specify gets changed to ‘Administrator’. I would Strongly recommend removing the Public IP associated with the VM and deploy Azure Bastion to protect your ASDK instance

Once the ASDK VM has been provisioned, connect to it (Bastion or RDP). The username you specified previously is ignored, so use ‘Administrator’ as the user and enter the password you defined.

Once connected, open a PowerShell window (as Administrator), and run the following as an example (I’m using ADFS as I’m simulating a disconnected environment)

C:\CloudDeployment\Setup\InstallAzureStackPOC.ps1 -TimeServer '129.6.15.28' -DNSForwarder '8.8.8.8' -UseADFS

You’ll then need to enter the AdminPassword when prompted, and then the script will do it’s magic (as long as the password is correct!) and take a number of hours to install.

The above recording shows the first few minutes of the script (sped-up! :) ).

After a few hours, the VM will reboot. If you want to check progress, you should use the following username to connect:

azurestackadmin@azurestack.local

Use the password you initially defined

Here’s some of the output you’ll see from PowerShell if you do connect as azurestackadmin (there’s still a few hours left to go!)

After 7hours 25 minutes, the install completed. You can determine this from the following log entry:

To prove that version 2206 has been installed, open the admin portal and check the properties for the region/instance.

As I used ADFS for this example, I had to login as cloudadmin@azurestack.local. If using AAD use the account you define when initially running the setup script.

Hope that helps if you want to deploy version 2206 as well as a simplified deployment tutorial.

Footnote: I tried using v5 series VM’s to deploy ASDK on, but it failed due to a network issue. I assume it is due to a different NIC/drive being used than the v3 series.

Hands on with GitHub Actions and Azure Stack Hub

The past few months, I’ve been working with GitHub Actions as the CI/CD platform for Azure hosted applications. Whilst that wasn’t using Azure Stack Hub, I wanted to see how I could use Actions within my environment, as I really like the low entry barrier, and GitHub is fairly ubiquitous.

From a high level, in order to achieve the integration, we need to use an Action Runner, which in simple terms is an agent running on a VM (or container) that polls for workflow action events and executes those actions on the Action runner system where the agent resides. GitHub can provide containerized runners out-of-the-box, and that’s great if you’re using a public cloud, but in the vast majority of cases, Azure Stack Hub is in a corporate network, so we can use a self-hosted runner for these scenarios, and that’s what I’ll be using here.

There are already some tutorials and videos on how you can integrate into your Azure Stack Hub environment, but I wanted to go a little deeper, from showing and explaining how to get your environment setup, to automating the creation of a self-hosted runner in your Azure Stack Hub tenant.

First, here are some links to some great content:

https://channel9.msdn.com/Shows/DevOps-Lab/GitHub-Actions-on-Azure-Stack-Hub

and the official docs:

https://docs.microsoft.com/en-gb/azure-stack/user/ci-cd-github-action-login-cli?WT.mc_id=devopslab-c9-cxa&view=azs-2102

As ever, the documentation assumes you are familiar with the platform. I won’t, so will go through step-by-step what you need to do and hopefully be successful first time!

Pre-requisites

Before you get started, here’s what you’ll need up-front:

  1. A GitHub account and a repository. I would highly recommend a private repo, as you will be deploying a self-hosted runner which is linked to this repo - this will be able to run code in your environment. GitHub make this recommendation here.

  2. An Azure Stack Hub environment with a Tenant Subscription that you can access (assumption here is we’re using Azure AD as the identity provider)

  3. (Optional) A service principal with contributor rights to the Azure Stack Hub tenant subscription. If you don’t have this, I detail how this can be done later..

  4. Azure CLI

  5. A GitHub Personal Access Token (PAT)

Credentials to connect to Azure Stack Hub

First thing we need is a service principal that has rights to the tenant subscription (I recommend contributor role). We will use these credentials to create a secret within our GitHub repo that we will use to connect to the subscription.

If you don’t already have an SP, following the official documentation helps us create one.

All my examples are being run from Linux and Azure CLI (Ubuntu WSL to be specific :) )

First, register your Azure Stack Hub tenant environment (if not already done so)

az cloud register \ -n "AzureStackHubTenant" \ --endpoint-resource-manager "https://management.<region>.<FQDN>" \ --suffix-storage-endpoint ".<region>.<FQDN>" \ --suffix-keyvault-dns ".vault.<region>.<FQDN>" \ --endpoint-active-directory-graph-resource-id "https://graph.windows.net/" \ --profile 2019-03-01-hybrid \

We need to connect to our Azure Stack Hub environment so that when the Service Principal is created, we can assign it to a scope.

Once the environment is defined, we need to make sure this is active.

az cloud set -n AzureStackHubTenant

Run this command to confirm that it is set correctly:

az cloud list -o table
3.ashenv.png

Next, let’s connect to our subscription hosted on Azure Stack Hub.

az login

If there’s more than one subscription, you might need to specify which subscription you want to connect to.

az account set --subscription <subName>
4.ashenv.png

We can see above that I have set the active subscription to ‘DannyTestSub’.

Next, we want to create our service principal. To make things easier, let’s have the CLI do the work in assigning the scope to the user subscription:

#Retrieve the subscription ID SUBID=$(az account show --query id -o tsv) az ad sp create-for-rbac --name "ASH-github-runner" --role contributor \ --scopes /subscriptions/$SUBID \ --sdk-auth

Running that should produce something like the following in my environment:

5.spCreatepng.png

It is important that we copy the JSON output as-is , we need this exact format to create our GitHub secret. Theoretically, if you already have a clientID and secret, you could construct your own JSON formatted credential like this:

{ "clientId": "<your_ClientID>", "clientSecret": "<your_Client_secret>", "subscriptionId": "<Azure_Stack_Hub_Tenant SubscriptionID>", "tenantId": "<Your_Azure_AD_Tenant_Id>", "activeDirectoryEndpointUrl": "https://login.microsoftonline.com/", "resourceManagerEndpointUrl": "https://management.<REGION>.<FQDN>", "activeDirectoryGraphResourceId": "https://graph.windows.net/", "sqlManagementEndpointUrl": null, "galleryEndpointUrl": "https://providers.<REGION>.local:30016/", "managementEndpointUrl": "https://management.<REGION>.<FQDN>" }

Now we have the credentials, we need to set up a secret within GitHub.

From the GitHub portal, connect to your private repo that you will use for Azure Stack Hub automation.

Click on the Settings cog

Click on the Settings cog

Click on Secrets

Click on Secrets

Click on ‘New repository secret’

Click on ‘New repository secret

Enter a name (I’m using AZURESTACKHUB_CREDENTIALS), paste in the JSON content for the SP that were previously created, and then click on  Add Secret.

Enter a name (I’m using AZURESTACKHUB_CREDENTIALS), paste in the JSON content for the SP that were previously created, and then click on Add Secret.

You should now see your newly added credentials under Action Secrets.

You should now see your newly added credentials under Action Secrets.

So we have our credentials and have setup an Actions runner secret, now we need an Actions Runner to run our workflows against within our Azure Stack Hub environment.

If you already have a Windows Server or Linux host running in your Azure Stack Hub tenant subscription, you can follow the manual steps, per the guidance given under the Settings/ Actions / Runner config page:

11.GHrunner.png

You can select the OS type of the system you have running and follow the commands.

Note: The ./config.(cmd|sh) command uses a token which has a short lifetime, so be aware if you use this method and are expecting to use it for automating self-hosted runner deployments!

12.GHrunner.png

The above method works and is OK if you want to quickly test capabilities. However, I wanted the ability to automate the runner provisioning process, from the VM to the installation of the runner agent.

I did this by creating an ARM template that deploys an Ubuntu VM and runs a Bash script that installs necessary tools (e.g. Azure CLI, Docker, Kubectl, Helm, etc.) and most importantly, deploys the agent and dynamically retrieves a token from GitHub to add our runner. One crucial parameter we need is a GitHub Personal Access Token (PAT). We need this to authenticate to the GitHub Actions API to generate the actions token.

To create the PAT, highlight your user account from the top right of the GitHub portal:

Click Settings

Click Settings

Click Developer Settings

Click Developer Settings

Select Personal access tokens and then Generate new token

Select Personal access tokens and then Generate new token

Set the scope to repo

Set the scope to repo

Scroll to the bottom and then click Generate token

Scroll to the bottom and then click Generate token

Make sure to copy the PAT, as you can’t retrieve it afterwards (you could always regenerate it if needed :) )

Make sure to copy the PAT, as you can’t retrieve it afterwards (you could always regenerate it if needed :) )

Now we have the PAT, we can go ahead and deploy the VM using the ARM template I created.

Go ahead and get it from

https://github.com/dmc-tech/AzsHubTools/blob/main/ghRunner/template.json

There’s nothing fancy; it deploys a VNET, NIC, Public IP, VM (it uses Ubuntu 18.04 - make sure you have it available via the Azure Stack Hub Marketplace!) and then deploys a Custom script to install a bunch of tools and the runner agent. The only parameters you will need to provide are:

Parameter Description
gitHubPat Personal Access Token used to access GitHub
gitHubRepo GitHub Repo to create the Self Hosted Runner
gitHubOwner GitHub Owner or Organisation where the repo is located for the Runner
adminPublicKey Public SSH key used to login to the VM

If you’re not sure how the Owner and Repo are derived, it’s simple:

To generate the adminPublicKey on Windows systems, I prefer to use MobaXterm. See the end of this post on how to generate the Private/ Public key

Deploy using the ARM template within your tenant subscription.

21.template.png

When deployed, it takes me about 10 minutes in my environment to complete.

22.template.png

We can see that the agent has successfully deployed by checking the Actions / Runners settings within our GitHub repo:

Success!!!

Success!!!

Now we can go ahead and test a workflow.

Within your repo, if it doesn’t already exist, create the following directory structure:

/.github/workflows

This is where the workflow yaml files are stored that our actions will use.

For a simple test, go ahead and copy the following into this folder in your repo (and commit it to the main branch!):

https://github.com/dmc-tech/AzsHubTools/blob/main/.github/workflows/testAzureStackHub.yml

The workflow is manually triggered ( workflow_dispatch ), and prompts for a parameter ( the name of the subscription you want to run the action against)

on: 
  workflow_dispatch:
    inputs:
      subscription:
        description: 'Azure Stack Hub User subscription'
        required: true
        default: 'TenantSubscription'

name: Test GitHub Runner in an Azure Stack Hub environment

env:
  ACTIONS_ALLOW_UNSECURE_COMMANDS: 'true'

jobs: 
  azurestackhub-test:
    runs-on: self-hosted
    steps:
      - uses: actions/checkout@main
      - name: Login to AzureStackHub with CLI
        uses: azure/login@releases/v1
        with:
          creds: ${  }
          environment: 'AzureStack'
          enable-AzPSSession: false

      - name: Run Azure CLI Script Against AzureStackHub
        run: |
          hostname
          subId=$(az account show --subscription ${  } --query id -o tsv)
          az account set --subscription ${  }

          az group list --output table

You can see that the workflow refers to the secret we defined earlier: secrets.AZURESTACKHUB_CREDENTIALS

The workflow configures the Azure Stack Hub tenant environment on the runner VM (using the values from the JSON stored in the secret), connects using the service principal and secret and then runs the Azure CLI commands to list the resource groups in the specified subscription.

To run the workflow, head over to the GitHub site:

Click on Actions and then the name of the workflow we added: ‘Test GitHub Runner in an Azure Stack Hub environment’

Click on Actions and then the name of the workflow we added: ‘Test GitHub Runner in an Azure Stack Hub environment

Click on Run workflow and type in the name of your Azure Stack Hub tenant subscription (this caters for multiple subscriptions)

Click on Run workflow and type in the name of your Azure Stack Hub tenant subscription (this caters for multiple subscriptions)

Hopefully you will see that the action ran successfully as denoted above.  Click on the entry to check out the results.

Hopefully you will see that the action ran successfully as denoted above. Click on the entry to check out the results.

Click on the job and you can see the output. You can see that the Azure CLI command to list the resource groups for the subscription completed and returned the results.

Click on the job and you can see the output. You can see that the Azure CLI command to list the resource groups for the subscription completed and returned the results.

With that, we’ve shown how we can automate the deployment of a self-hosted runner on Azure Stack Hub and demonstrated how to run a workflow.

I really like GitHub Actions and there’s scope for some powerful automation, so although what I’ve shown is very simple, I hope you find this of use and helps you get started.

Appendix: Creating SSH keys in MobaXterm

1. Click on Tools2. Select MobaKeyGen (SSH key generator)

1. Click on Tools

2. Select MobaKeyGen (SSH key generator)

1.  Click on Generate2. Copy the Public key for use with the ARM template.3. Save the Private Key (I recommend setting a Key passphrase). You’ll need this if you need to SSH to the VM!

1. Click on Generate

2. Copy the Public key for use with the ARM template.

3. Save the Private Key (I recommend setting a Key passphrase). You’ll need this if you need to SSH to the VM!

Rotating Event Hubs RP External Certificate on Azure Stack Hub

I have been testing the Event Hubs public preview release for Azure Stack Hub, looking at the install process and what kind of actions an Operator would need to do to keep things running. One of the important ones for me, are rotating secrets / certificates. If your certificates expire, you won’t be able to access the RP, hence the importance.

If you check the current documentation for rotating secrets , it is the generic instructions for rotating external certificates for the Azure Stack Hub Stamp. I expect that this will be corrected in the near future, but until then , how do you do go about it for the Public Preview?

Firstly, you need the latest version of the Azure Stack Hub PowerShell modules:

Then you need to connect to your Azure Stack Hub Admin environment. Use the steps detailed in the following article : https://docs.microsoft.com/en-us/azure-stack/operator/azure-stack-powershell-configure-admin?view=azs-2002

(Remember if using the Az Module to rename the Commands per https://docs.microsoft.com/en-us/azure-stack/operator/powershell-install-az-module?view=azs-2002#7-use-the-az-module)


Copy the Event Hubs pfx file to a local directory and run the following script (The example is using theAz module)t:

$ProductId = 'microsoft.eventhub'
$productVersion = (Get-AzsProductDeployment -ProductId microsoft.eventhub).properties.deployment.version
$PackageId = ('{0}.{1}' -f $ProductId, $productVersion)
$packageSecret = ((Get-AzsProductSecret -PackageId $PackageId).value.name).split('/')[2]
$certPath = 'C:\AzsCerts\EventHubs\cert.pfx'

$pfxPassword = (ConvertTo-SecureString '<pfxPassword>' -AsPlainText -Force)
Set-AzsProductSecret -PackageId $PackageId -SecretName $packageSecret -PfxFileName $certPath  -PfxPassword $pfxPassword -Force -Verbose

Invoke-AzsProductRotateSecretsAction -ProductId $ProductId


Modify the $certPath variable and <pfxPassword> to match what you have set and then run the script.

The process will take quite a long time to complete. Whilst the operation is taking place, you will receive the status of the command.

If you choose to stop the CmdLet/script, the process will continue in the background. You can check the status at anytime by running the following:

(Get-AzsProductDeployment -ProductId microsoft.eventhub).properties

You should see something like this when the process is still running:

… and when successfully finished:

Hope that helps until the official documentation is released!

Article updated 16 July 2020 with an updated method to obtain the secret name, provided by @kongou_ae - Thanks!